Lightroom Classic’s Lens Blur tool uses AI to achieve something rather remarkable, inferring depth and distance in a two-dimensional image. It’s designed to offer a digital simulation of the kind of shallow depth of field you get from very wide lens apertures.
It’s not just a stylistic decision but a compositional tool, too, because it can help separate subjects from their backgrounds so that they stand out more clearly with fewer distractions.
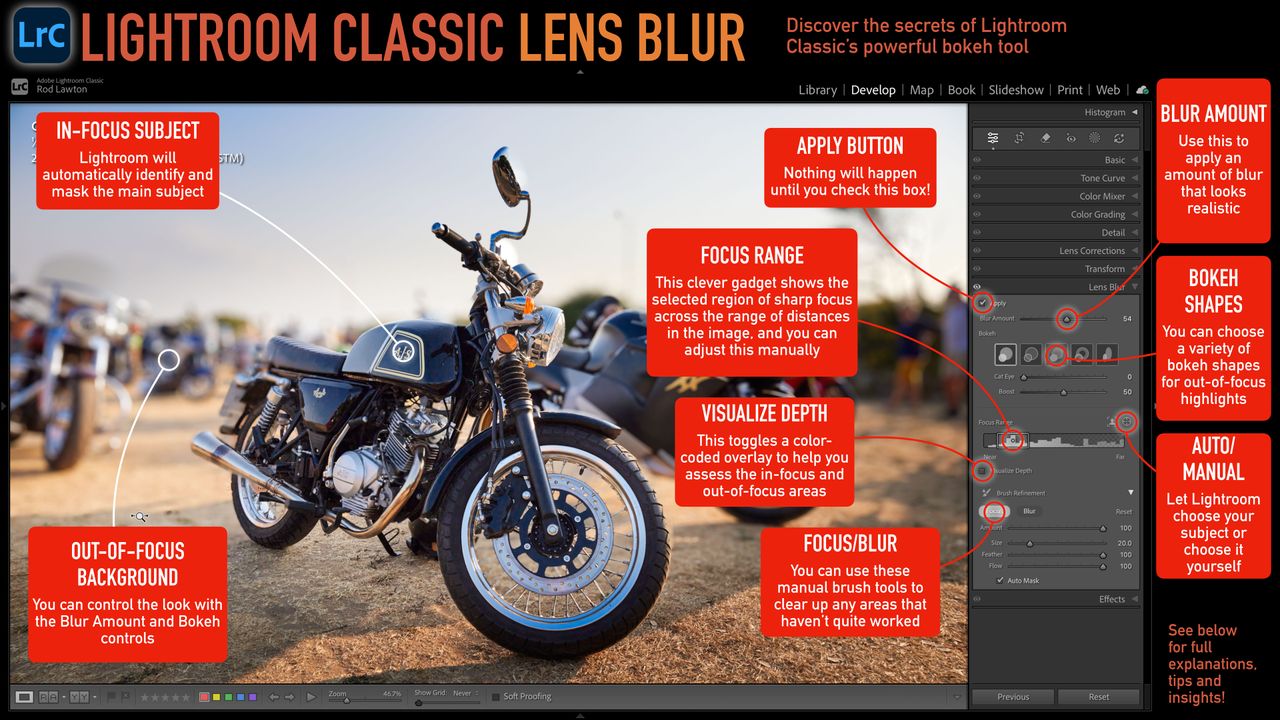
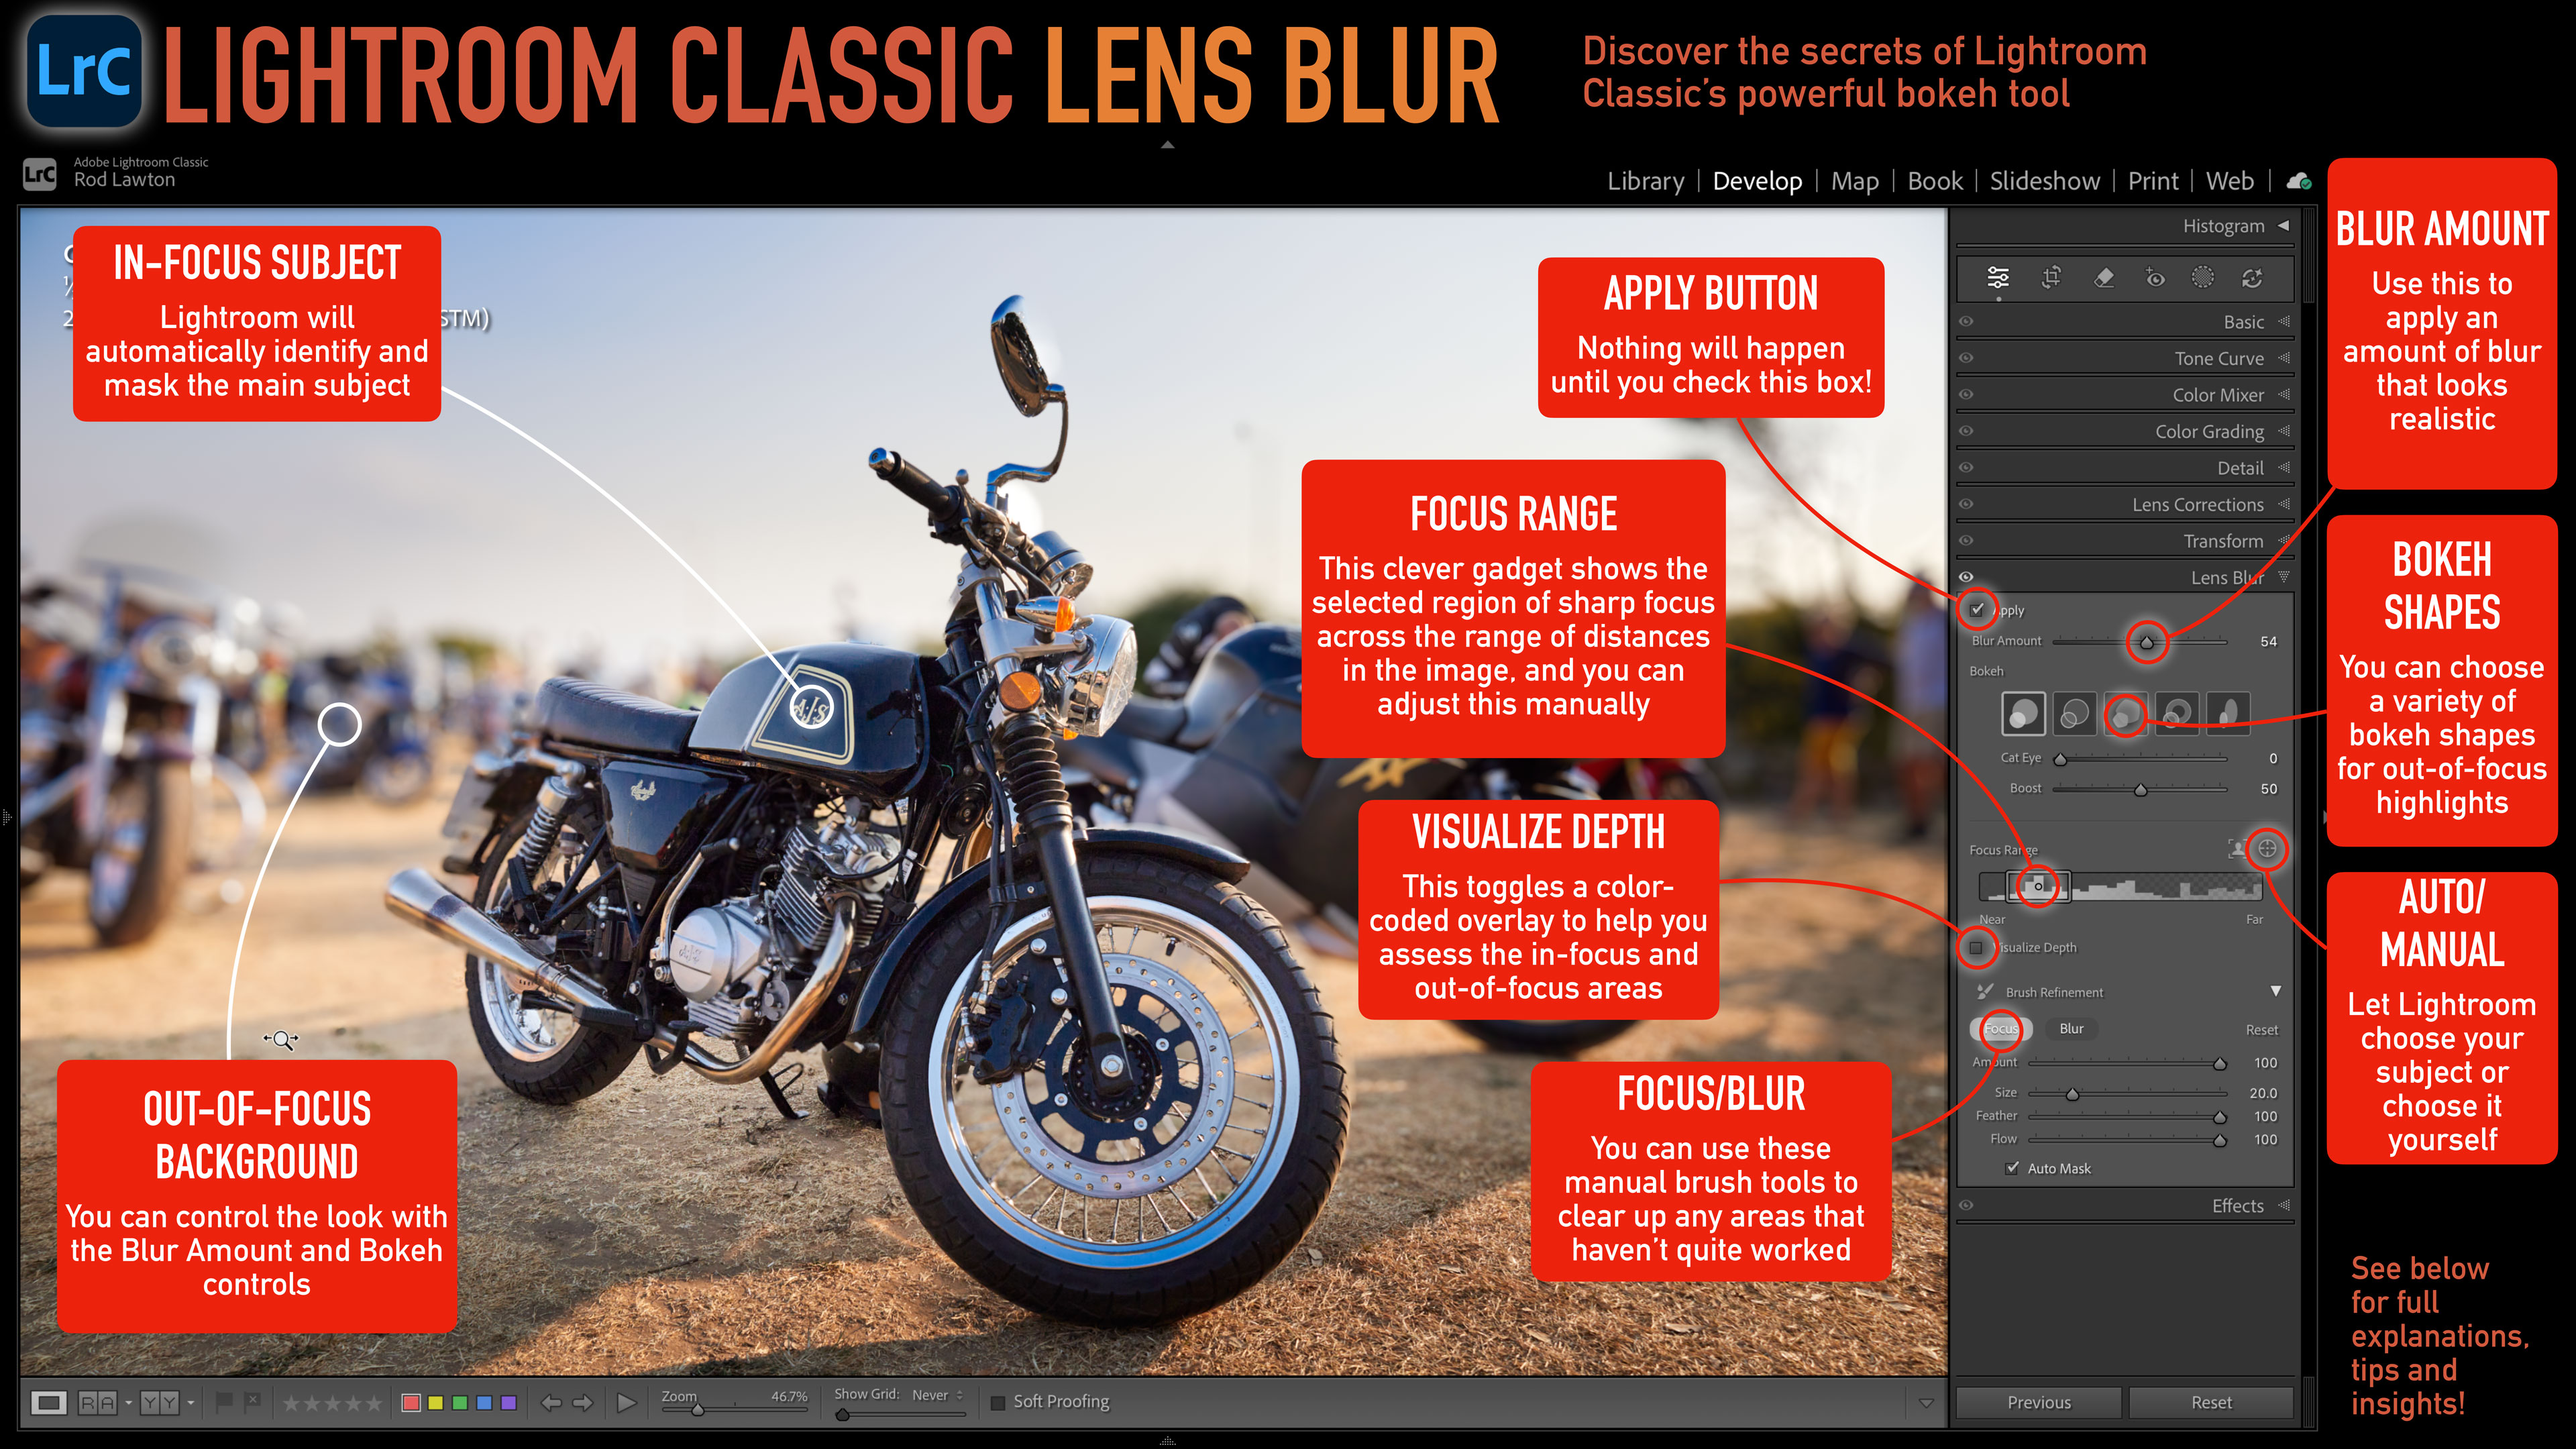
Early versions of this tool tended to struggle with areas of background seen through holes in the main subject, but as this tool has evolved with successive versions of Lightroom it has become much more capable. Here’s my guide to the main features of the Lens Blur panel, what they do and how they work.
Focus range
This is the central tool in this panel. After Lightroom’s AI analysis, it presents the distance range in the image from closest (left) to farthest (right).
Within that range it displays a bounding box, which Lightroom thinks represents the key subject in the scene. You can accept and work with this as it stands, but you can also drag this box left and right to change the ‘focus distance’ and you can also drag on the left or right handles to adjust the near and far focus distances.
It’s easy to adjust this sharp focus range manually, but it’s not always easy to improve on Lightroom’s initial estimate!
Blur Amount
You can use this slider to adjust the blur in out-of-focus areas, and you might find that you need to keep coming back to this adjustment as you make other changes (to the focus range, for example). It’s easy to get carried away, but it’s important to keep the results realistic.
Blur can backfire if you push it too far! In our sample image, the degree of background blur could easily make the motorcycle look like a model shot from close up
Bokeh shapes
Bokeh is a characteristic of lenses that can be replicated surprisingly well digitally. With this tool, though, the differences between the different bokeh shapes (such as circle, bubble, hexagon, ring, cat eye) are not always easy to see, so it’s up to you how long you want to spend on this.
Bokeh shapes show up most clearly with out-of-focus specular highlights or light sources in the background
Auto / manual subject detection
When you first use the Lens Blur too, Lightroom will attempt to identify the key subject automatically. These days it rarely gets this wrong, but there may be times when you want to shift the focus to a subject or area in the background rather than the foreground, so this is how you do it.
Visualize depth
You can generally see pretty clearly how the Lens Blur tool is focusing and defocusing different parts of the image, but if you need a little help, check this box. It adds a color-coded overlay to the image, which illustrates different distances and defocus amounts with different colors.
Focus and Blur tools
You’ll find these in the ‘Refinement’ section at the bottom of the Lens Blur panel, and you can use them to manually paint in or paint out areas of sharp focus. (Lightroom uses ‘focus’ to mean objects or distances in sharp focus.)
This is all done with a simple manual brush tool, but that’s fine – if you do need to alter the depth mask and subject selection, it’s because the AI hasn’t got it quite right and needs the skill and judgement of the human eye.
Do pay attention to the Size, Feather and Flow sliders. Very often you’ll be trying to blend in the focus adjustment subtly, building up the effect gradually rather than trying to achieve pixel-perfect masking
You might also like…
Take a look at the best photo editing software and the best free photo editing software. And if you're sick of Adobe, check out the best Lightroom alternatives and the best Photoshop alternatives.